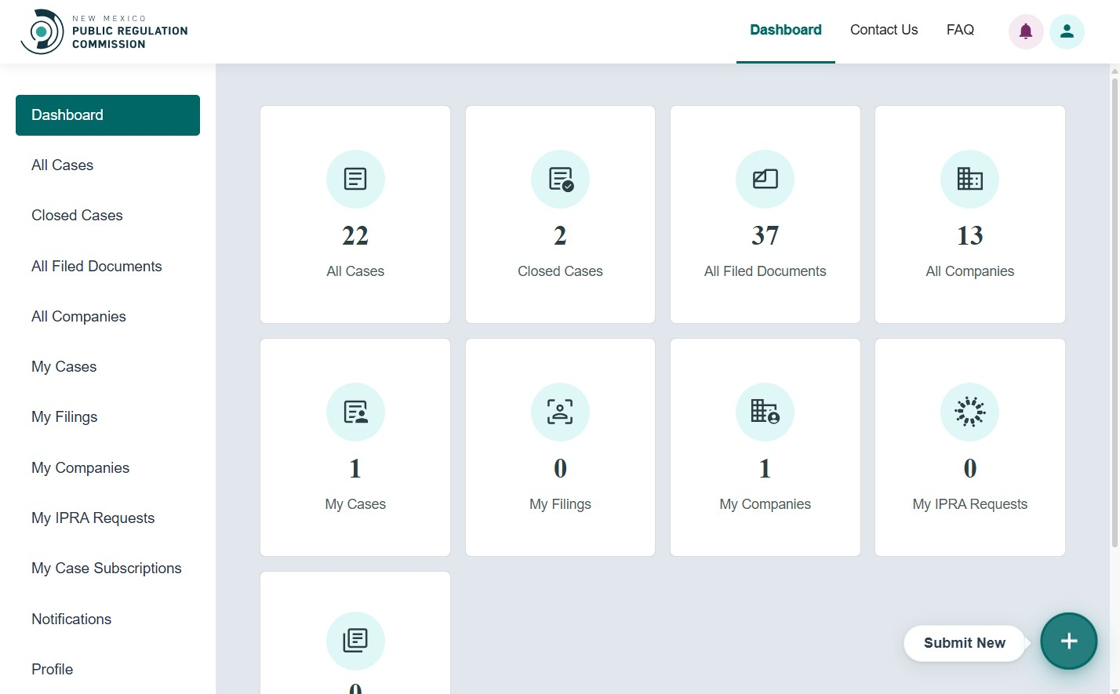
Submit New Docket
When a user logs in to the NMPRC External Portal as a Tier 2 user, the login process is the same as that of a Tier 1 user (refer to the New User Registration guide).
However, Tier 2 access requires prior approval from the New Mexico Public Regulation Commission (PRC).
The dashboard layout is similar to that of a Tier 1 user, featuring tiles and a left-hand navigation menu.
Only Tier 2 users have the ability to submit new docket requests.

Example Scenario
Real-World Example
Attorney Robert represents a telecommunications company that needs to file a new application for service expansion. He has Tier 2 access and needs to create a new docket with supporting documentation.
- Company information (already registered in system)
- Docket type and category (Telecommunications - Service Expansion)
- Party information (applicant details)
- Lead attorney information (his own details)
- Supporting documents (application, maps, technical specifications)
- Notice recipients (parties who need to be notified)
- Robert logs in with his Tier 2 account
- He clicks "Submit New" → "File a New Docket"
- He completes the docket information form:
- Selects "Telecommunications" as docket type
- Enters docket caption describing the service expansion
- Selects the company from the dropdown
- He adds party information (company details)
- He adds lead attorney information (his own contact details)
- He uploads required documents (application, technical specs)
- He adds notice recipients (other parties to the proceeding)
- He certifies and submits
- He receives a confirmation number
- Within 2-5 business days, PRC reviews and assigns official docket number
- Once approved, the docket becomes active and he can file additional documents
Timeline: Filing (30-45 min) + Review (2-5 business days)
Ensure all required documents are ready before starting. You can save progress, but it's easier to complete in one session.
File a New Docket
Click the Submit New button at the bottom right of the screen.
A pop-up window will appear displaying multiple filing request options.
Select File a New Docket to begin.

Create New Docket
The Create New Docket screen allows users to initiate a new Docket filing.
All fields marked with an asterisk (*) are mandatory.

Docket Information
This section captures the basic details of the Docket being filed. The following fields are available:
- Type of Docket* – Dropdown to select the category/type of Docket (e.g., Pipeline, Telecommunications, or Utility).
If the user selects Utility, an additional dropdown for Docket Category appears.

- Party Type* – Dropdown to specify the party type involved in the Docket (e.g., Applicant, Commission Staff, Utility Company).
- Docket Caption* – Text field to enter the Docket title.
- Select Company* – Search-enabled dropdown to select the associated company.
Note:
To create a company, refer to the Register New Company document.
Party Information
This section collects details about the parties involved in the filing.
Contact Information
- First Name*, Last Name*, Email*, Phone Number*
- Address Line 1*, Address Line 2, City*, State*, Postal/Zip Code*

Lead Attorney Information
Similar fields as Contact Information apply for the Lead Attorney.
All required fields are marked with an asterisk (*).

Authorized Filer
- Are you filing on behalf of another authorized filer?* – Radio buttons (Yes/No).
If Yes, additional fields appear for entering filer details.

Additional Parties
Users can add more parties to the Docket by selecting Yes when prompted.

Follow the on-screen prompts to add party details. You may add Company or Individual types and include address information as required.
Note:
Only include entities or persons currently defined as parties under NMAC Rule 1.2.2.7.
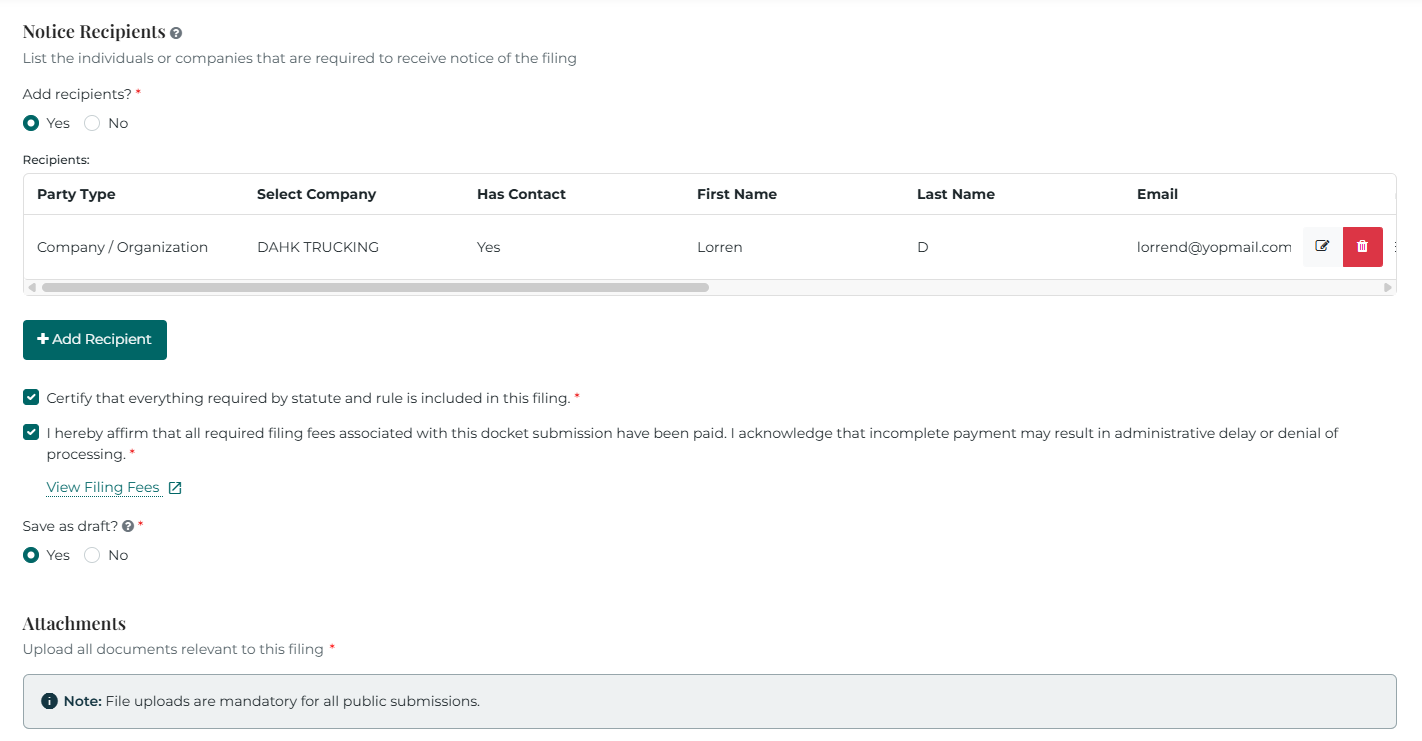
Notice Recipients
- Add Recipients?* – Radio buttons (Yes/No).
If Yes, users can add recipient details following the same process as adding party information.
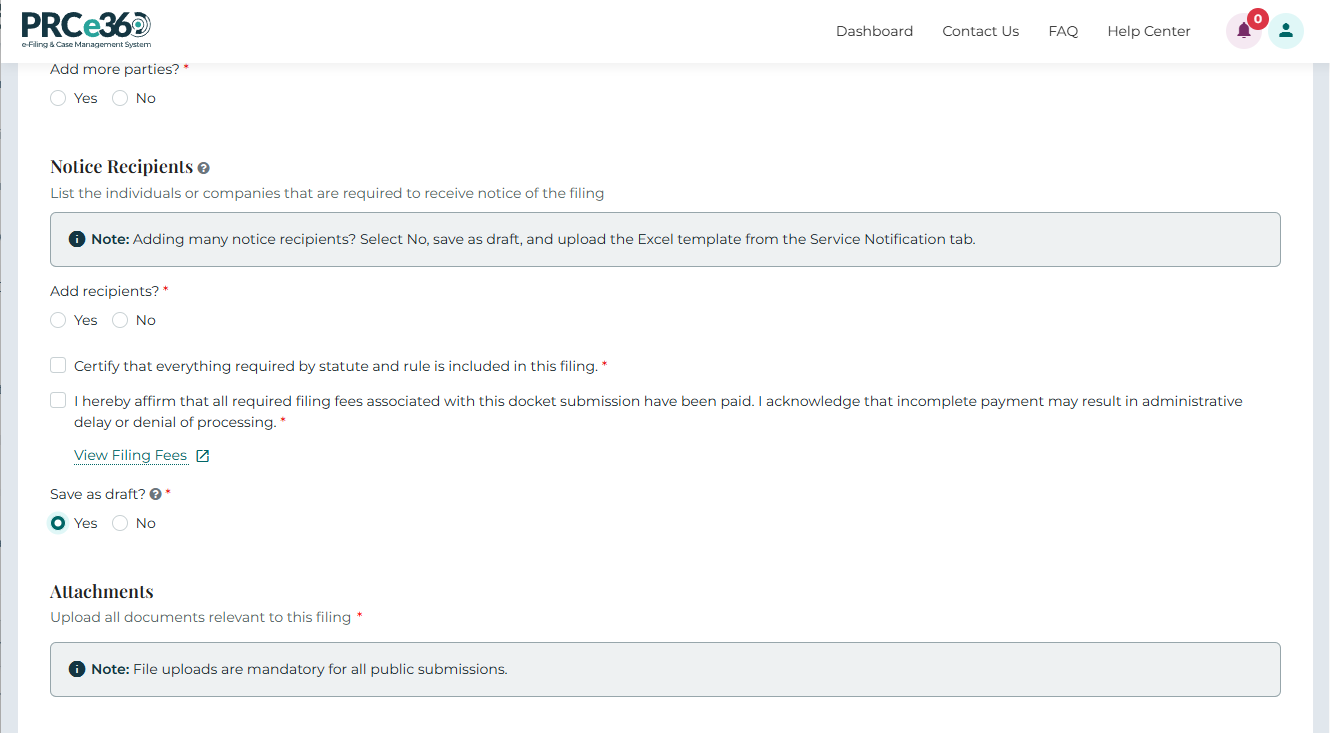
Users can add multiple recipients by clicking the + Add Recipient button. How to bulk upload service notification Contacts
Terms & Conditions
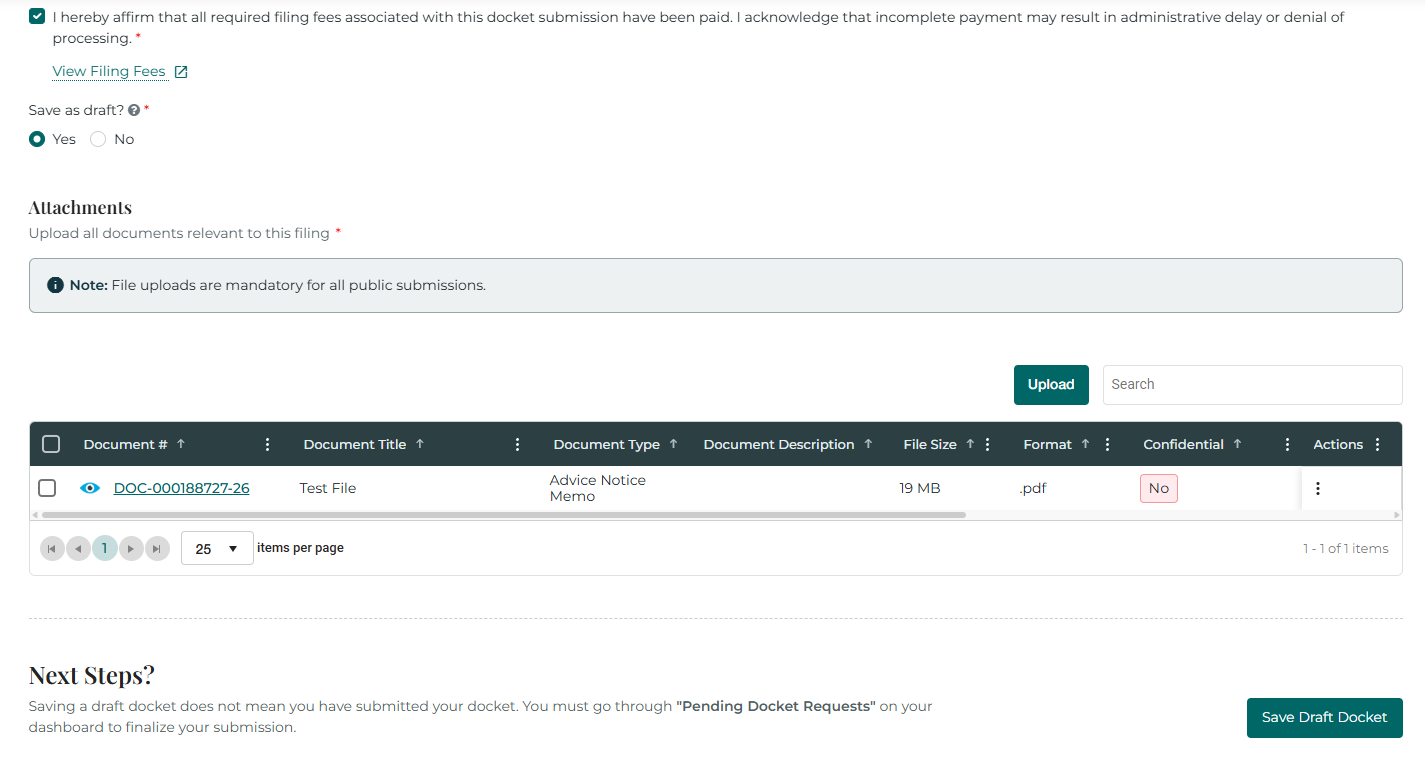
Before submitting, the user must check all required boxes:
- Certify that everything required by statute and rule is included.*
- Affirm payment of all required filing fees.*
How to add large service lists to a new docket request?
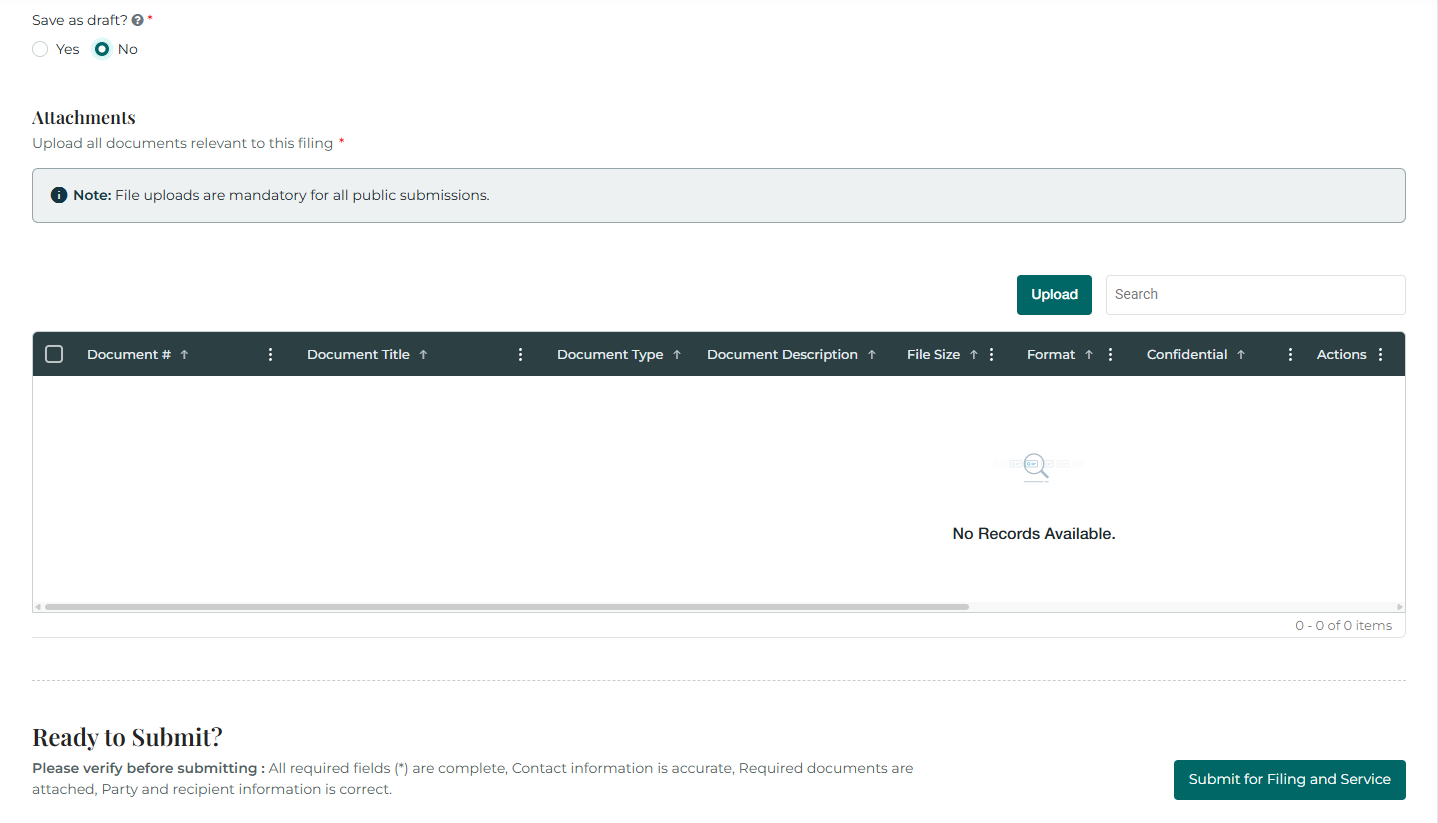
Save as Draft? – Radio buttons (Yes/No).
When Yes is selected, the system allows users to save the docket in draft status rather than submitting it.
Attachments
The Attachments section allows uploading documents relevant to the Docket filing.
Uploaded documents appear in a grid with the following columns:
- Document #, Title, Type, Description, File Size, Format, Confidential, Uploaded, and Actions.
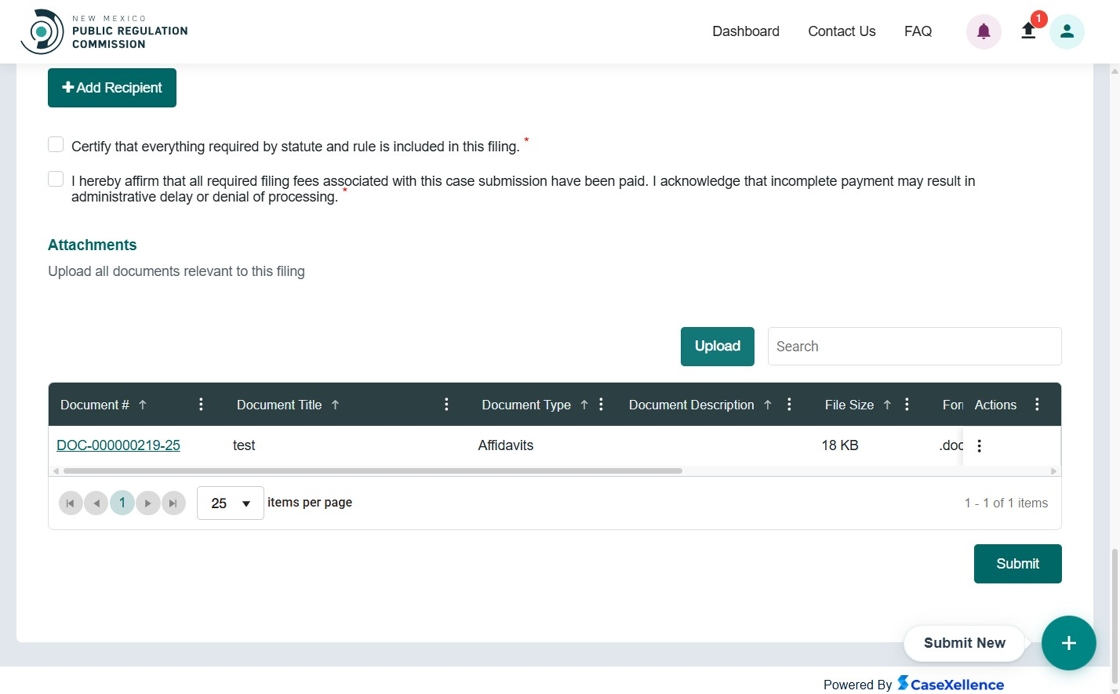
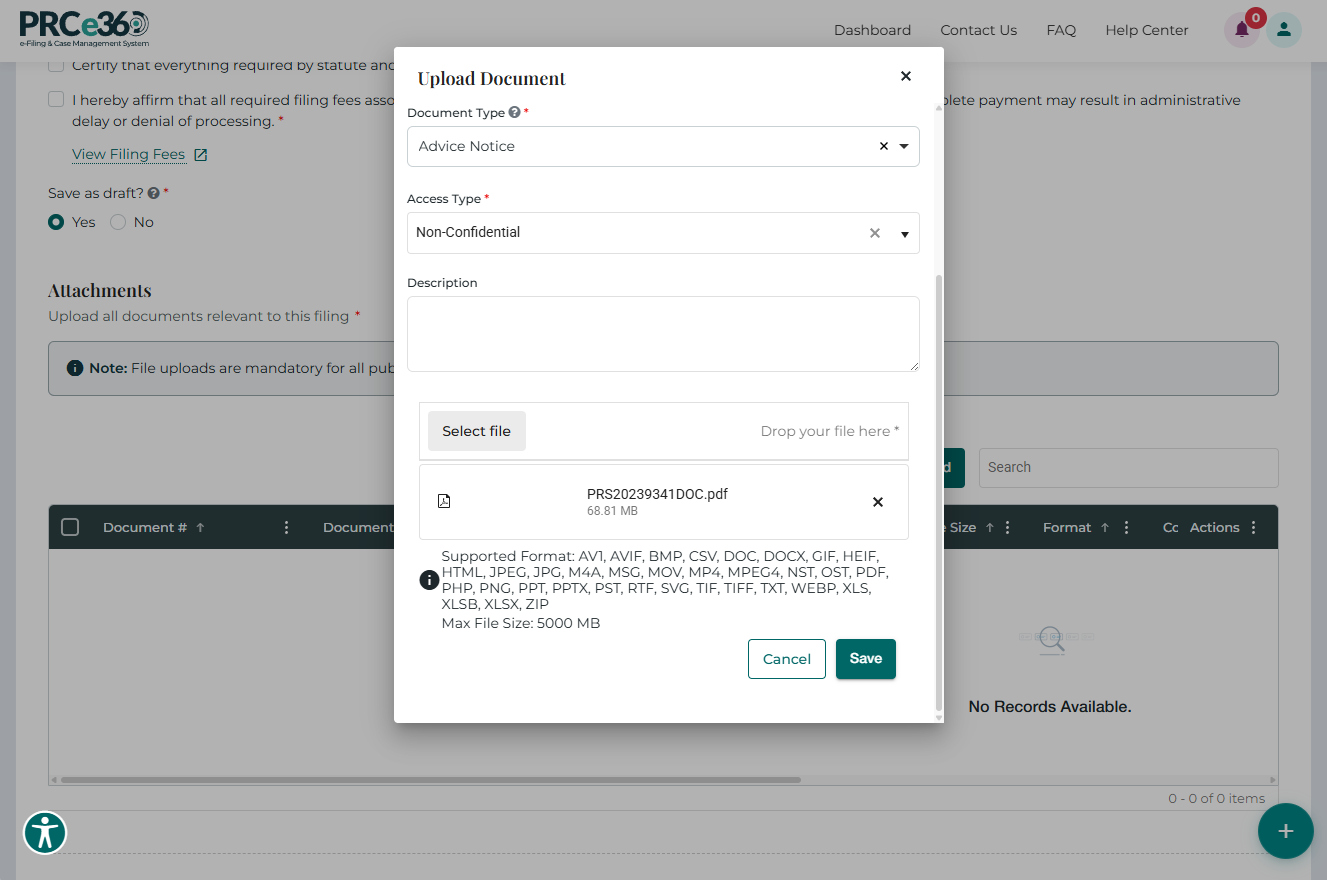
Upload Document
Clicking the Upload button opens a pop-up to add document details, including:
- Document Title*, Type*, Access Type*, Description, Select File*
After completing all fields, click Save to upload or Cancel to close.
Save Draft Docket
After completing all required fields and uploading any mandatory documents, users can choose to save their progress instead of submitting the docket. This option is helpful when additional information is needed before final submission.
Submit for Filing and Service
This option becomes available when all required information has been entered, the Save as draft? option is set to No, and all mandatory documents have been uploaded.
What Happens After Save as Draft
Immediate Steps
- Confirmation: You'll receive a confirmation number immediately after submission
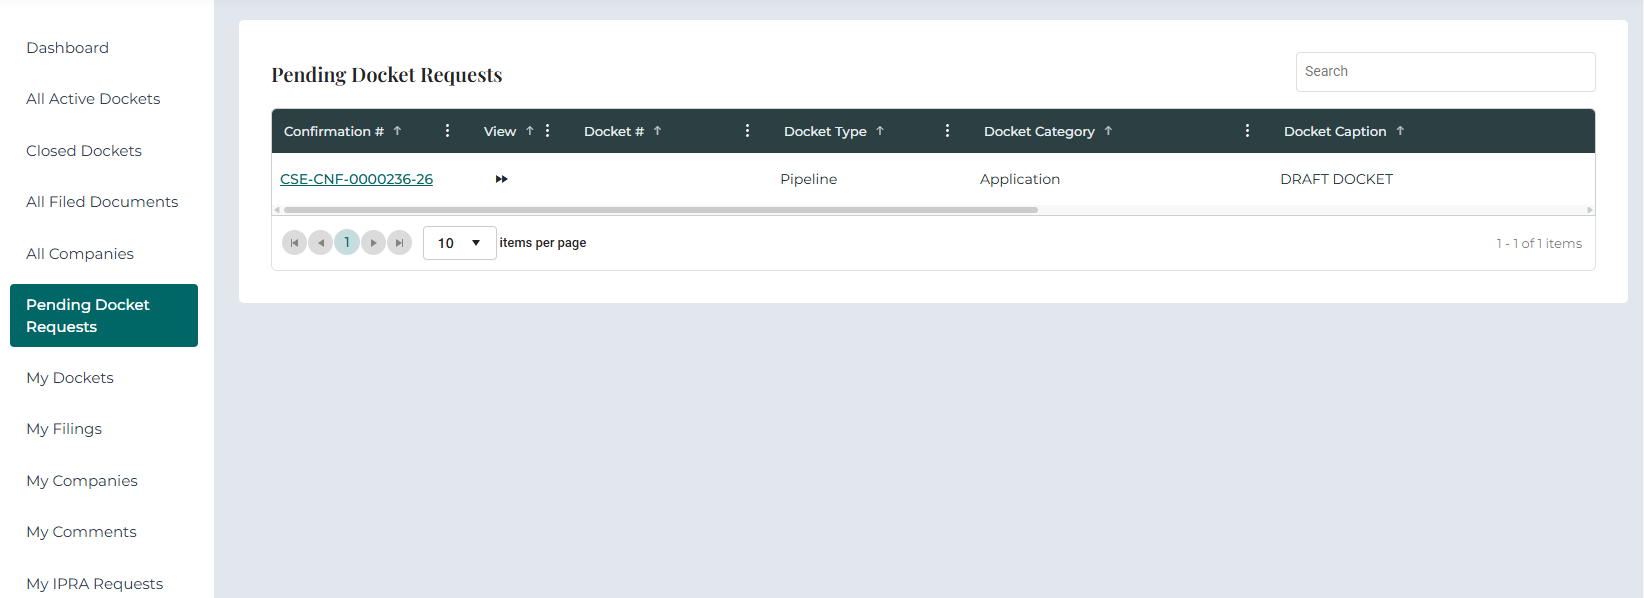
- Dashboard Update: Your docket request appears in **Pending Docket Request ** with status Draft
Important: Save your confirmation number for future reference!
Accessing Saved Draft Dockets (Tier 2 Users)
A Tier 2 user can access and continue working on previously saved draft dockets.
Steps to Open a Draft Docket:
- Go to the Dashboard.
- Locate and click the Pending Docket Request tile.

- In the grid view, find the draft docket you want to continue working on.
- Click the Confirmation ID to open and resume editing the selected draft docket.
Bulk Upload to Draft Docket
Tier 2 users can bulk‑upload service notification records directly into a draft docket.
Steps to Perform a Bulk Upload: How to bulk upload service notification Contacts
What Happens After Submission
Immediate Steps
- Confirmation: You'll receive a confirmation number immediately after submission
- Email Notification: A confirmation email is sent to your registered email address
- Dashboard Update: Your docket request appears in My Dockets with status New or Pending Review
Important: Save your confirmation number for future reference!
Review Process
Timeline: Typically 2-5 business days for initial review
-
PRC Staff Review:
- Your docket request is routed to the appropriate PRC division
- Staff reviews for completeness, compliance, and accuracy
- May request additional information or clarification if needed
-
Status Updates:
- New/Pending → Request received, awaiting review
- Active → Docket approved and assigned official docket number
- Rejected → Request denied (you'll receive reason)
-
Email Notifications:
- You'll receive email updates when status changes
- Check your spam folder if you don't see emails
If Your Docket is Approved
Once approved:
- Status changes to Active
- An official Docket Number is assigned
- Your docket appears in All Active Dockets
- The docket becomes part of the public record
- You can file additional documents into the docket
Next Steps:
- Monitor your dashboard for updates
- Check My Dockets for the official docket number
- You may receive requests for additional information
- Follow the docket through the regulatory process
- File additional documents as needed using File Into Existing Docket
If Your Docket is Rejected
If rejected:
- You'll receive an email with the rejection reason
- Status shows as Rejected in your dashboard
- Review the reason and correct any issues
- You can submit a new docket request with corrected information
Common Rejection Reasons:
- Missing required information or documents
- Incorrect docket type or category selection
- Incomplete party or contact information
- Missing required certifications
- Information doesn't meet regulatory requirements
Tracking Your Docket
Ways to track:
- My Dockets - View status, confirmation number, and details
- Email Notifications - Receive updates automatically
- Case 360 View - Click confirmation number to see all docket information
- All Active Dockets - Once approved, view in public queue
Filing Additional Documents
After your docket is approved:
- Use File Into Existing Docket to add documents
- All filings become part of the public record (unless marked confidential)
- Monitor the docket for responses from other parties
Need Help?
- Status Questions: Check your dashboard or contact Get Help
- Rejection Issues: Review rejection notice and Troubleshooting Guide
- Process Questions: Contact filing support via Get Help
View Docket Details
Once approved, users can view Docket details by selecting My Docket from the main menu.
Clicking a Docket ID opens the Case 360 view for complete Docket information.
